|
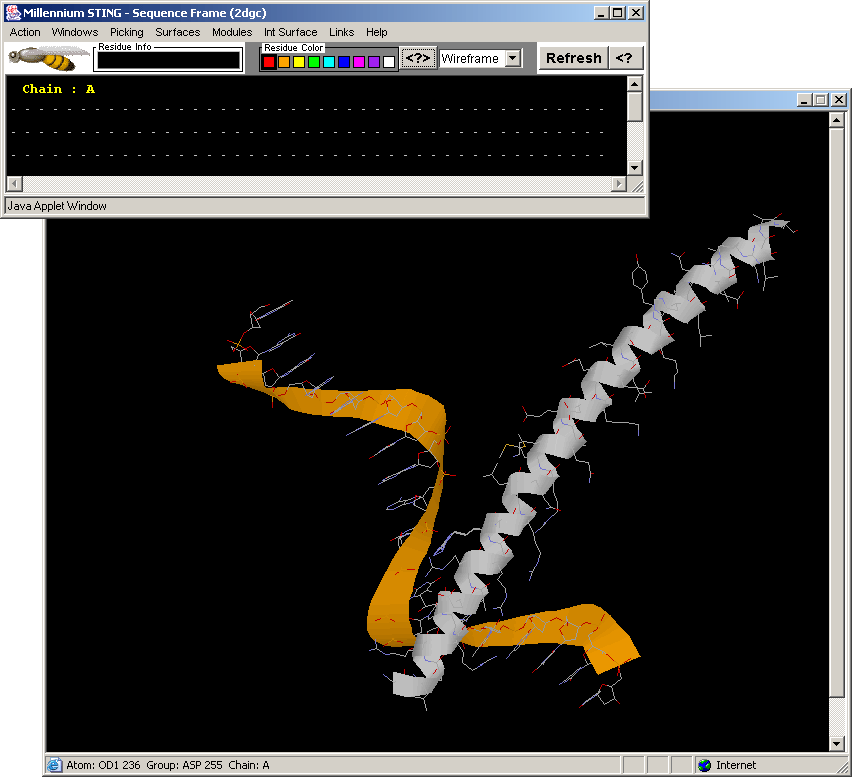
- Press:{Shift left mouse button within the Graphics Window}:
enlarge image a little!
- Observe: in the Sequence Window that sequence of the
A chain starts with residue number 229, causing BLUE STAR STING to show
long stretch of "------" as indication of missing residues!
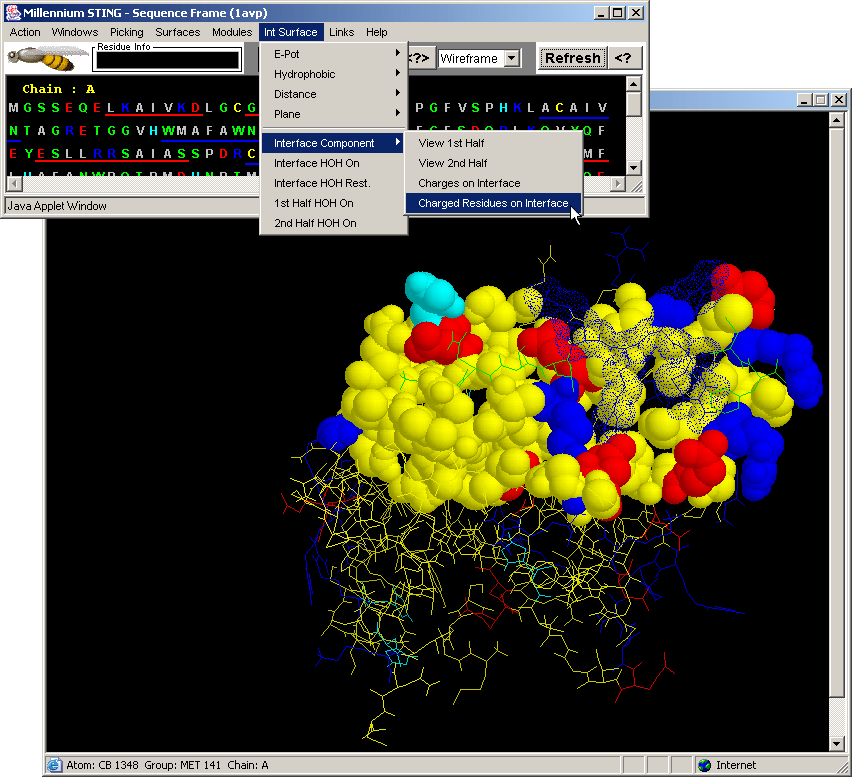
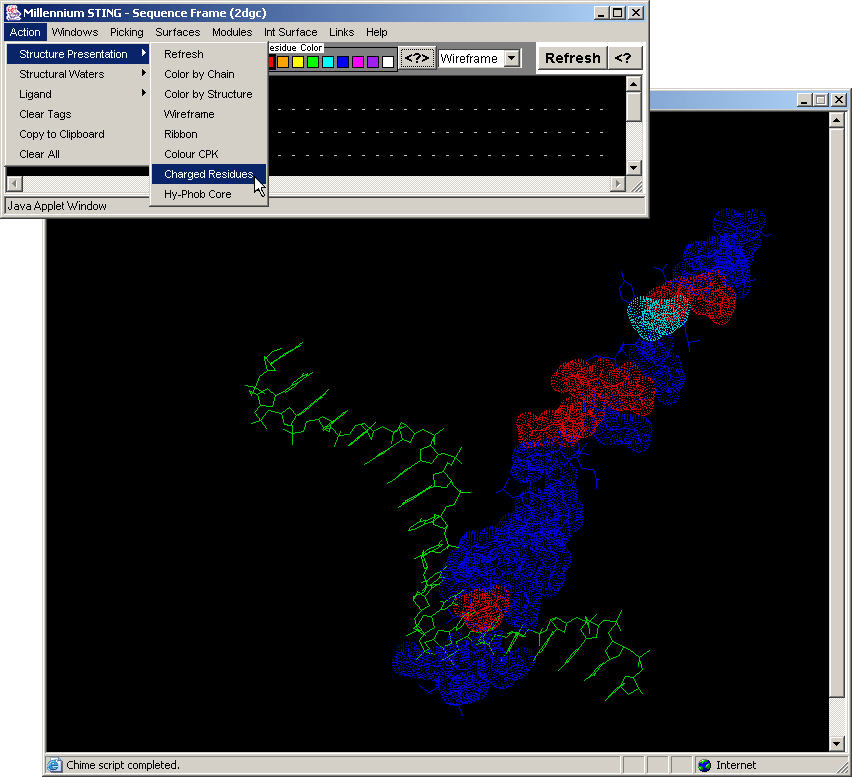
- Press: [Action:Structure Presentation:Charged Residues] on BLUE STAR
STING menu option
- Observe: [fig.7.] all charged residues are colored on the protein
chain, clearly indicating positively charged moiety engaged in DNA binding.
Curiously, there is also negatively charged Glutamic acid in this region:
E, chain A,#237.
- Slide: mouse over sequence residues at the Sequence Window!
Residue numbers will appear on the BLUE STAR STING Status Frame!
Note that BLUE STAR STING handles well negative residue numbers
for DNA chain
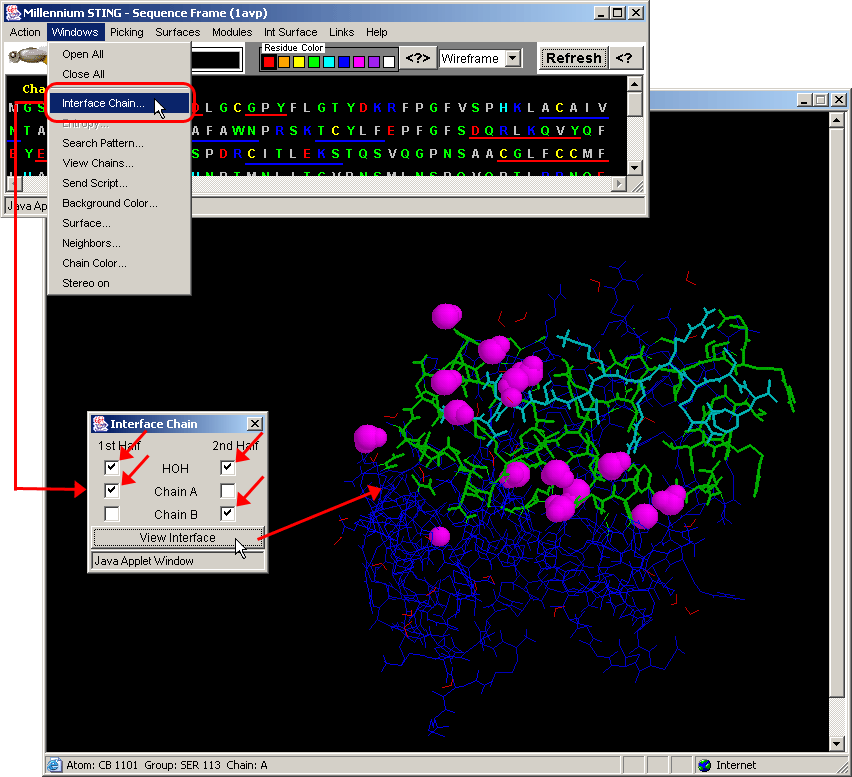
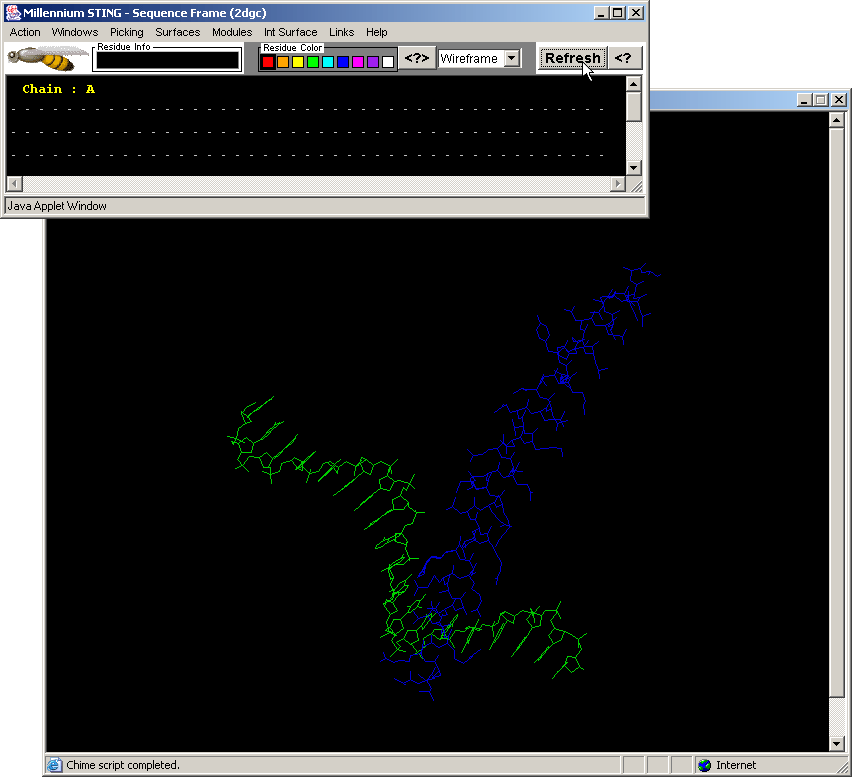
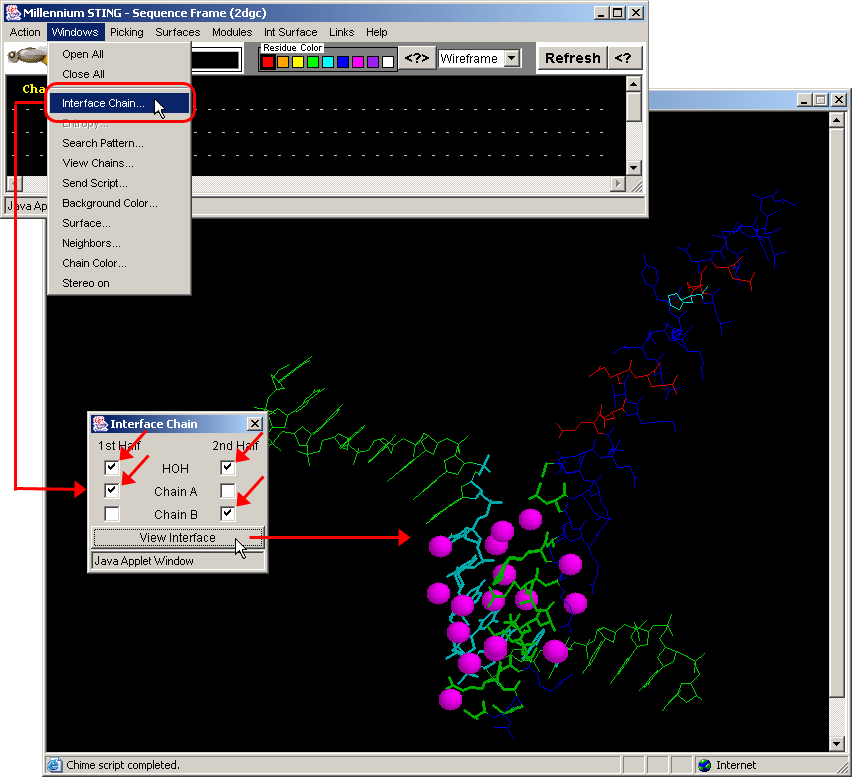
- Press:[Windows: Interface Chain]! [Fig.8.]
- Press:[Int Surface: HOH+Interface]!
- Observe:water molecules in-between protein and DNA surface, clearly
involved in H-bond network formed among two molecules!
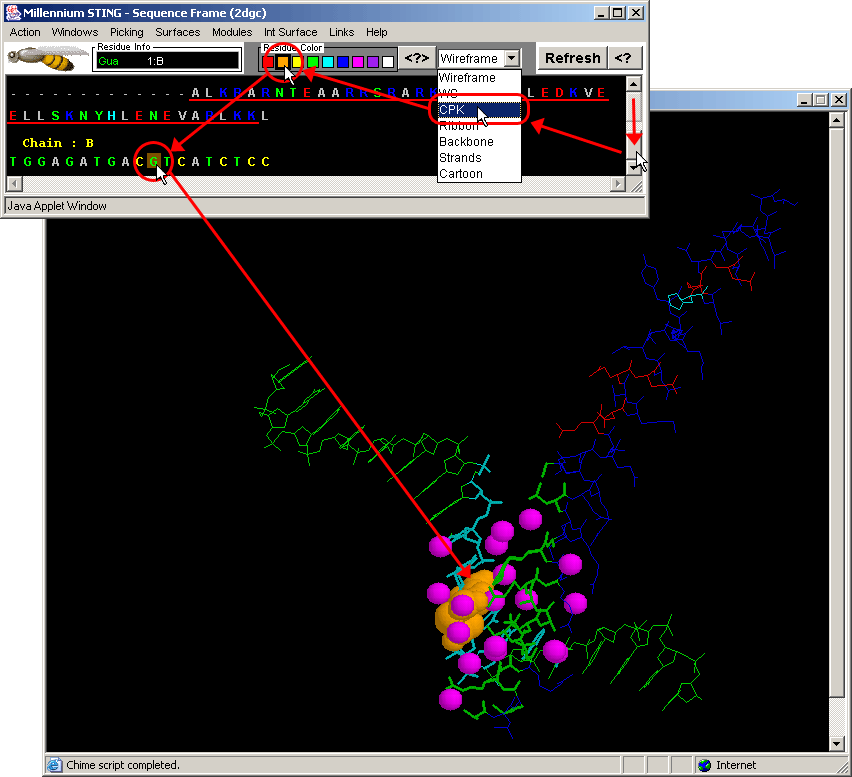
- Click:(Sequence Frame) on B chain, nucleotide G,#1. [Fig.9.]
- Observe:this is a central nucleotide of the DNA bound stretch!
- Final Screen: You will get screen as shown bellow:
- And Beyond: Use [Int Surface:1st Half HOH on] and [
Int Surface:2nd Half HOH on] to get exclusive view on first half
and then second half of the complementary Interface Forming Residues (IFR)
with water molecules in their vicinity! See FEATURES
chapter for the explanation of these commands, as well as differences
between [Int Surface:Interface component: View 1st half] and [Int Surface:Interface
component: View 2nd half]! Very useful BLUE STAR STING command is [Int
Surface:Interface component: Charges on Interface]; here the user
can see how charge (and not charged residues, as in above example) is
distributed and how it is complemented at Interface halves!
STING: Ligand
Pocket and Coordinating Residues
In this example, we will look at the Ligand Pocket within Protein
Fold
Step by step instructions
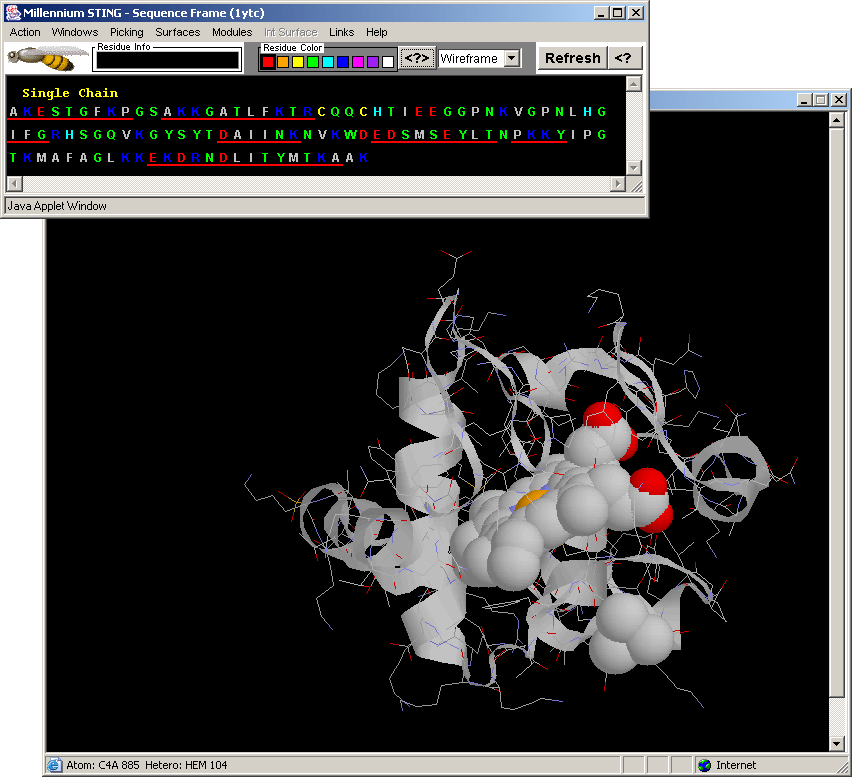
- First of all, open the pdb file 1ytc, by typing in
this 4 letter code and then pressing "Enter" key on the keyboard,
at entry BLUE STAR STING page (simply
click on the STING It button, and you will be in familiar area).
- You will get screen as shown below [fig.10.], rotate the molecule
until you get the view as in Fig.11.:
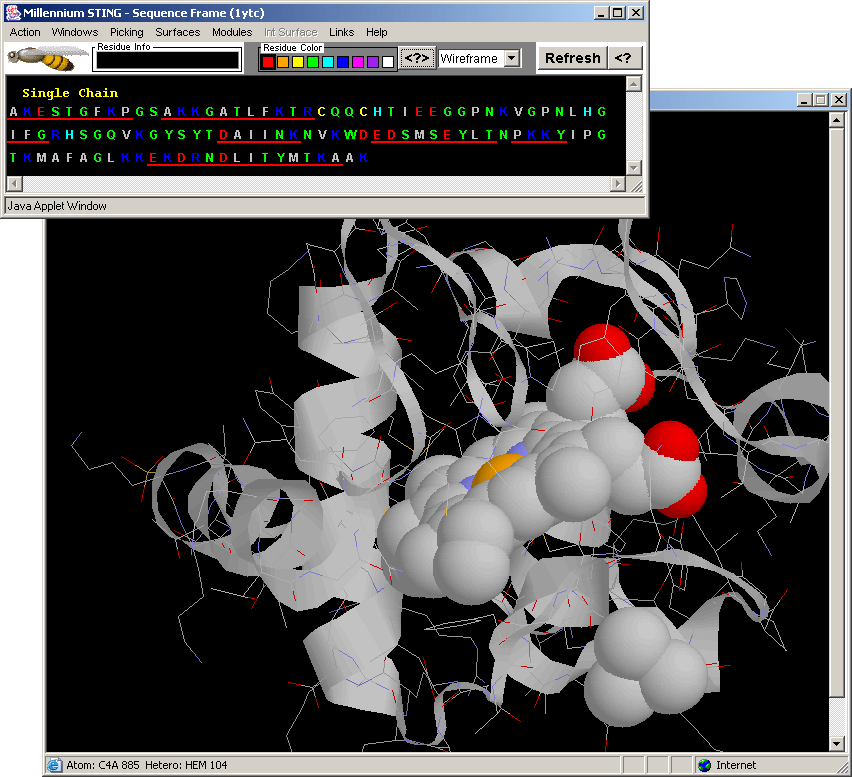
- Press:{Shift left mouse button within the Graphics Window}:
enlarge image a little! Turn it to get most pleasing view on the molecule!
[fig.11.]
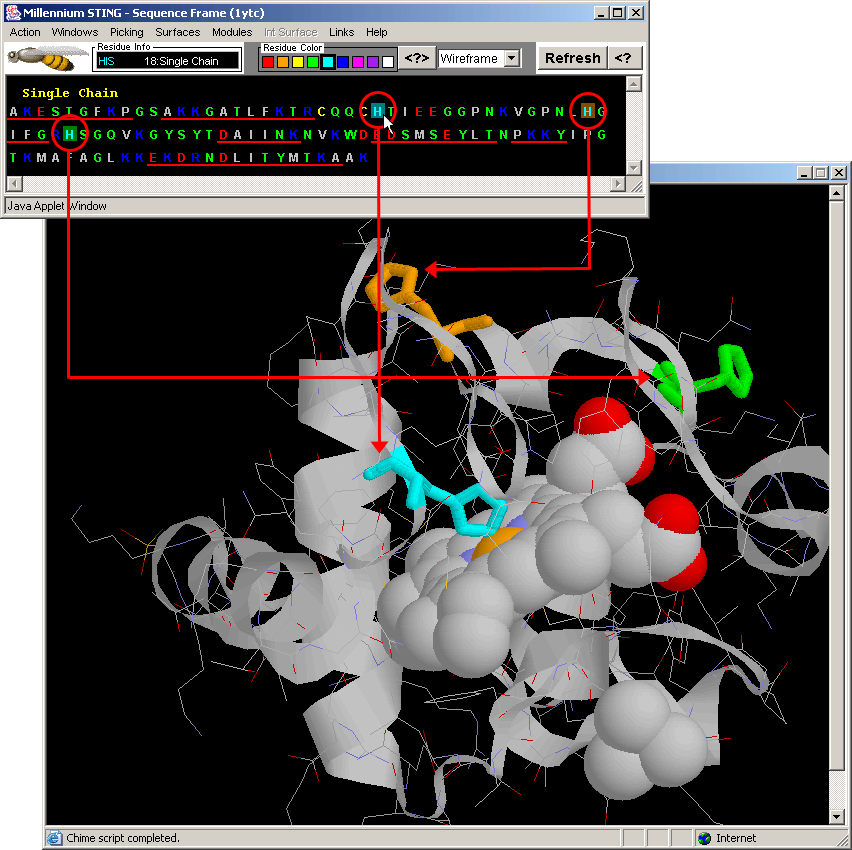
- Observe: in the Sequence Window: there are 3 Histidine
residues! Click on each of them (choosing indicated colors and WS
presentation) to see 3D position with respect to HEME. Clearly, HIS
#18 is the one coordinated to Fe of the HEME ligand! [Fig.12.]
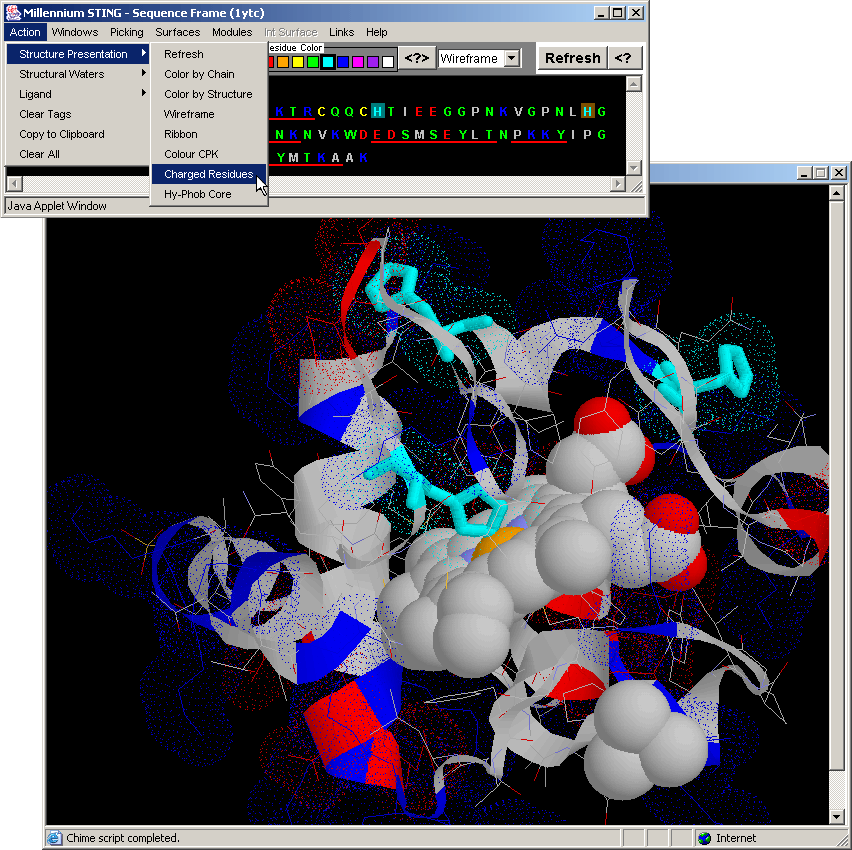
- Press: [Action: Structure Presentation:Charged Residues]
on BLUE STAR STING menu options.
- Observe: all charged residues are colored (blue=positively
charged amino acids, red=negatively charged amino acids and cyan=hysitdine)
and presented in dotted spheres on the protein chain, clearly indicating
Histidine residue engaged in HEME (LIGAND) binding.
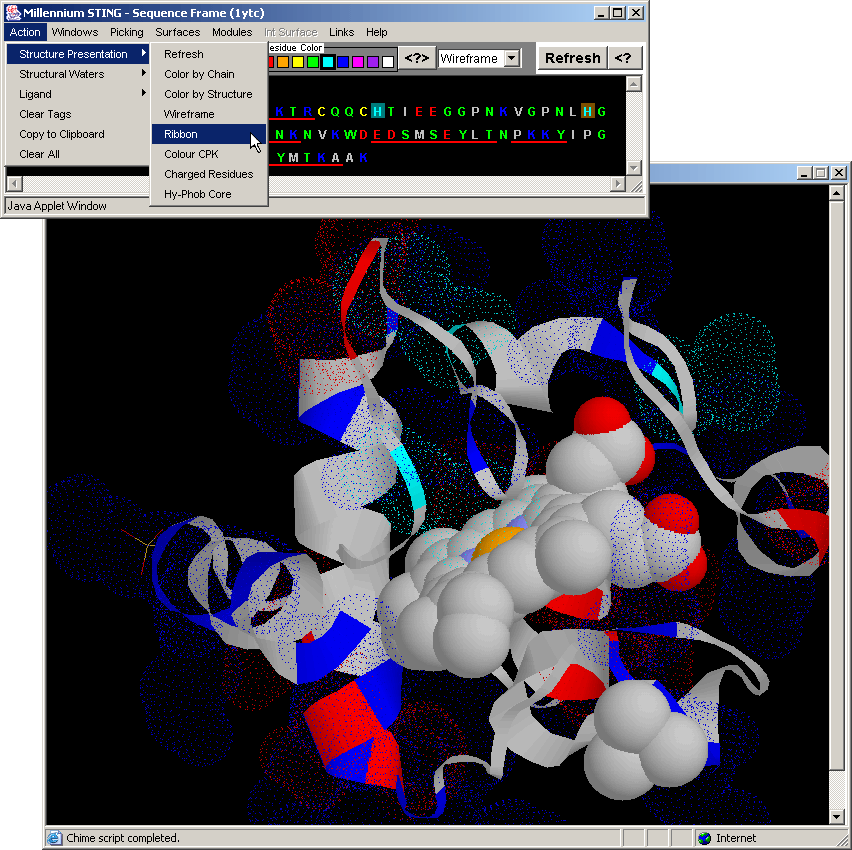
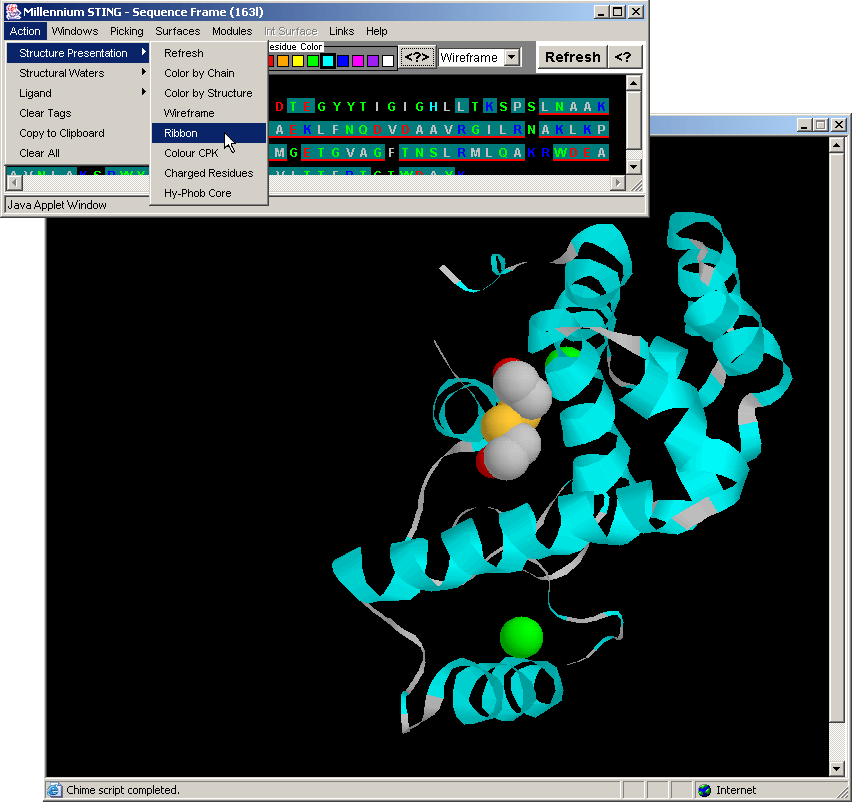
- Press:[Action: Structure Presentation:Ribbon] on BLUE STAR
STING menu options. [Fig.14.]
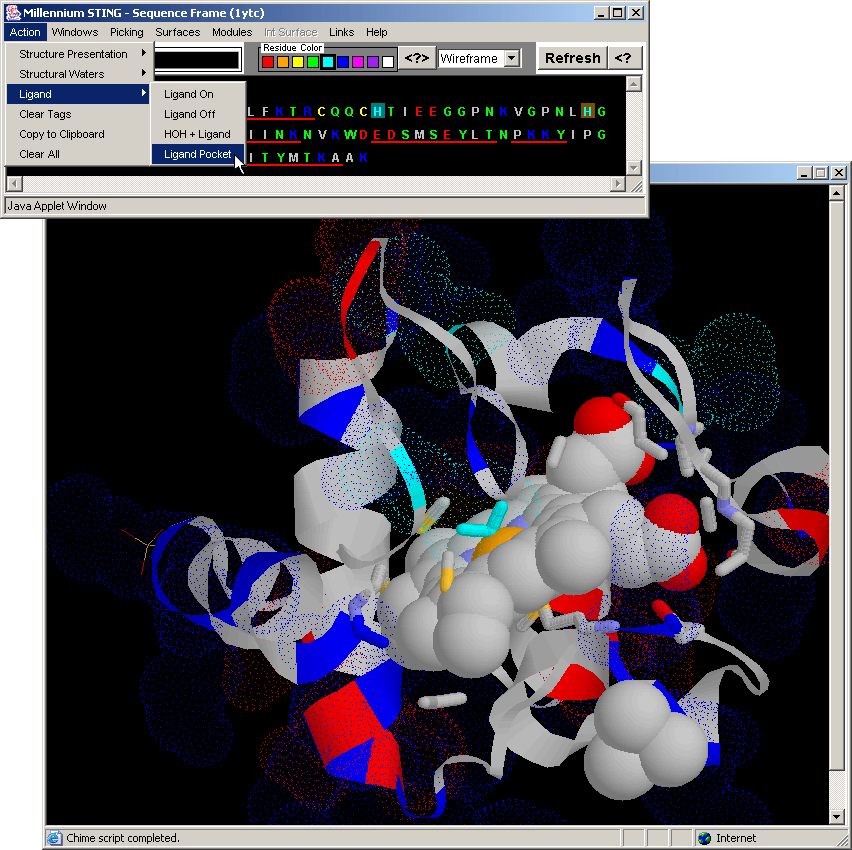
- Press:[Action: Ligand:Ligand off]
- Press:[Action: Ligand:Ligand on]
- Observe: Histidins placed appropriately around Ligand for
coordination.
- Press:[Action: Ligand:Ligand Pocket]
- Press:[Action: Ligand:Ligand off]
- Press:[Action: Ligand:Ligand on]
- Observe: only atoms in contact with LIGAND are presented
in WS graphics format.
- Final Screen: You will get screen as shown on Fig.15. Below:
- Possible STING responses that might be confusing: sometimes you
might see Pocket but not the LIgand! See for the example here!
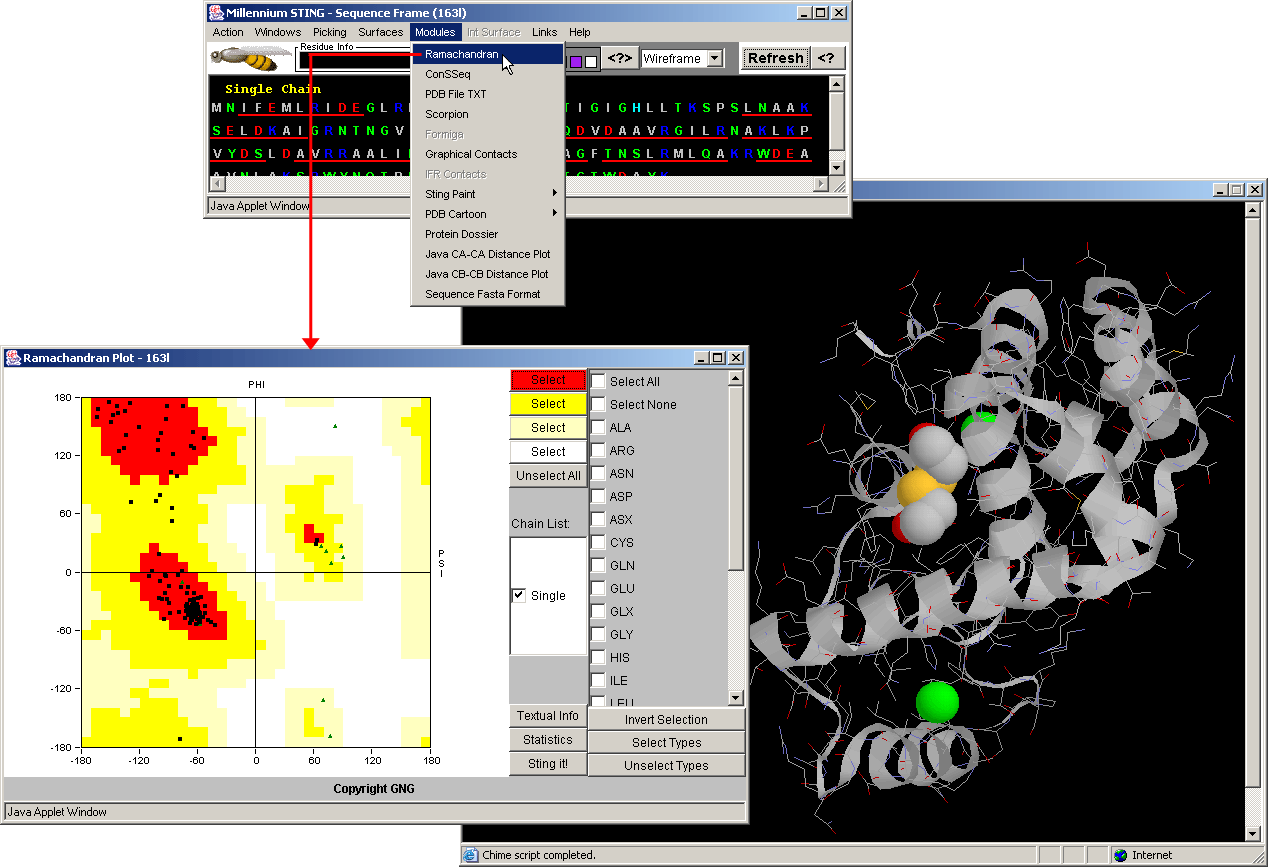
BLUE STAR STING:
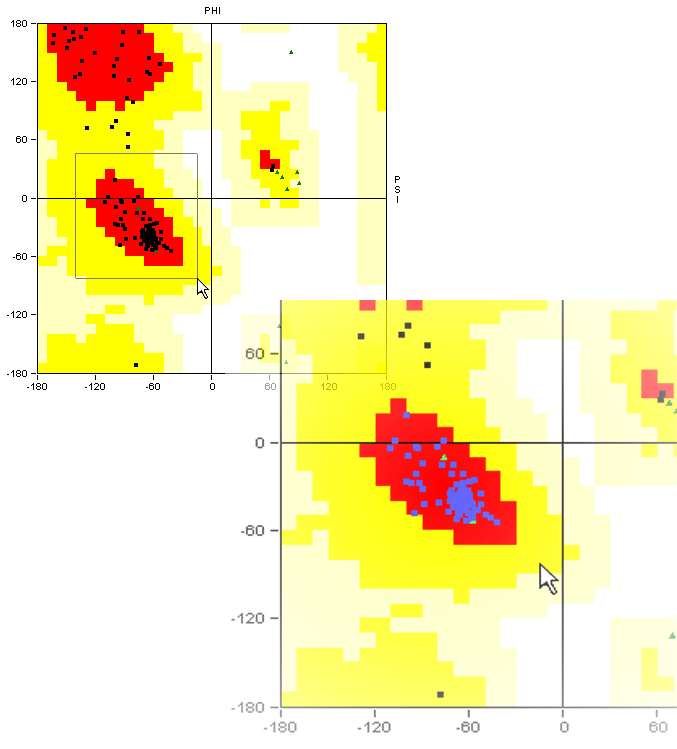
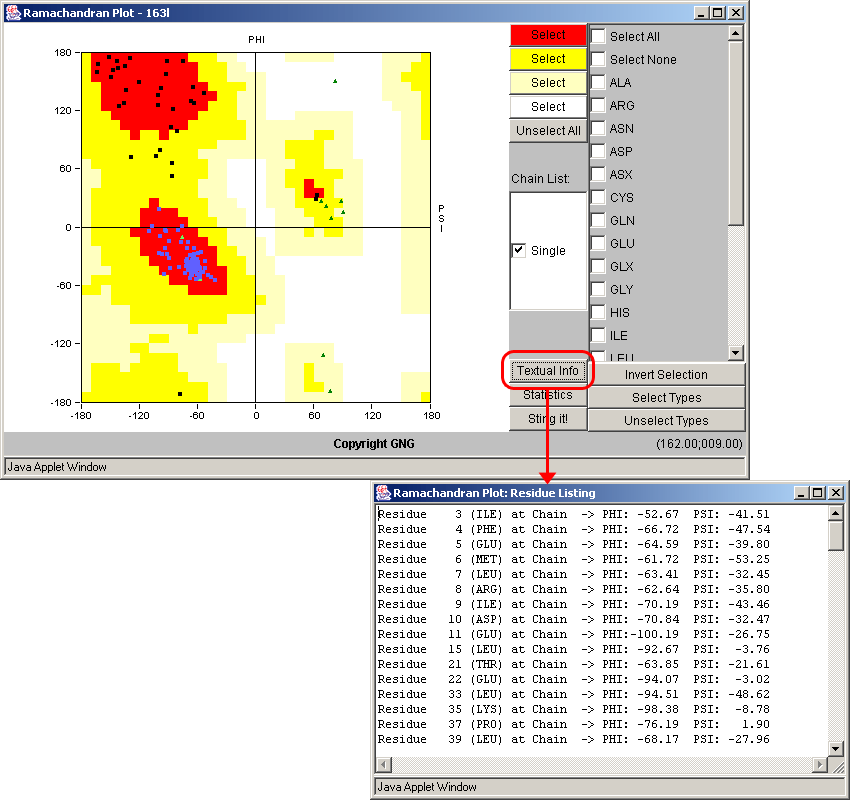
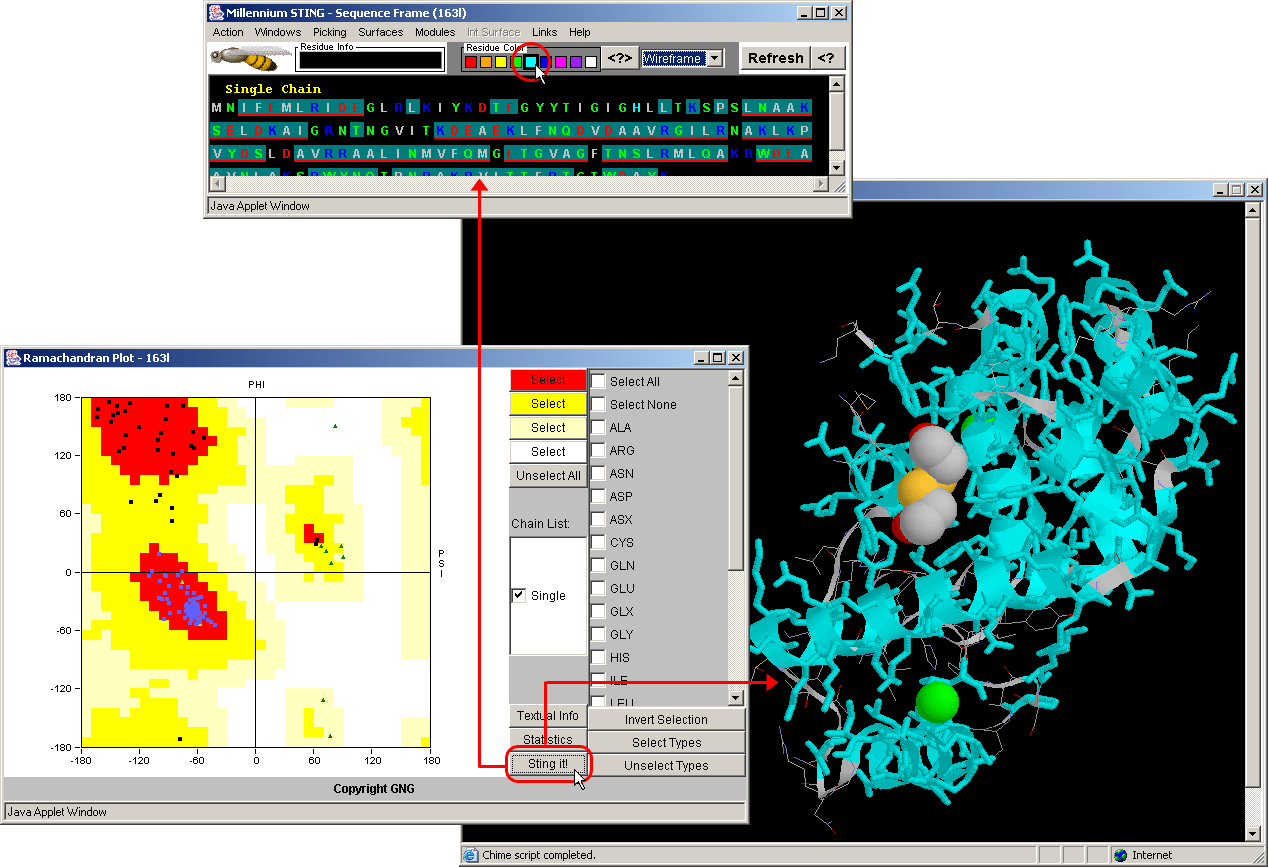
Ramachandran plot
Step by step instructions
- No text! Just follow the graphical instructions and get acquainted
with Ramachandran plot.
|
 BLUE STAR STING: Charge complementarity
on molecular interfaces
BLUE STAR STING: Charge complementarity
on molecular interfaces